 A freshly painted, nicely finished front door is a great addition to any home. Not only will it impress visitors and passers-by, it increases your home’s curb appeal and will put a smile on your face when you get home. This short guide will explain how to paint a door quickly and efficiently and achieve a good, clean finish.
Introduction
A well-painted door is something of a status symbol. Have you ever dreamed of having a door that looks as clean and glossy as the iconic “Number 10” front door? Painting a door so that it looks that good requires careful and systematic work, but if you do it well then you will have an attractive, weather-proof door that will retain its shine for several years.
Tools needed
To prepare and paint a door you will need:
- A dust sheet
- Sandpaper
- White spirit
- A paint scraper
- Primer
- A paint brush (a small roller can be handy for painting the panels, but is not essential)
- Paint
- Wood putty and a putty knife for filling in any holes or damage on the door
- A damp cloth
Time required
Each coat of paint should take no more than half an hour to apply, however you will need to let the paint dry between each coat, and wait at least two hours after applying the final coat before re-attaching the hardware and hanging the door in the frame.
Step by step instructions
If you are painting a new door, leave the door in the room where it will be installed for a couple of days so that it can acclimatise to the temperature and humidity of the room. This will reduce the chances of shrinkage or expansion causing problems once the door is in the frame.
If you are painting a door that is already in place, you can either remove it and paint the whole door, or paint it in situ, ignoring the top and bottom of the door since no-one will ever see these anyway. If you are painting the door in-situ, it is a good idea to use some low-tack masking tape to cover the hinges and any parts of the door frame that might accidentally get splashed by paint. Low-tack tape is more expensive than traditional duct tape and masking tape but it is worth paying the extra because it comes off more easily and does not leave any unsightly residue.
Once you are ready to paint the door, follow these steps:
- Make sure the room that you are painting in is well ventilated and that you will not have nay children or pets underfoot while you are working
- Cover your working area with a dust sheet
- Remove all hardware and fixings from the door
- If the door is already painted, strip the paint carefully using white spirit and a scraper, then sand the door with fine sandpaper until you achieve a smooth finish
- Inspect the door for damage and fill in any holes with wood putty
- Use fine-grade sandpaper to sand down any rough edges
- Clean the door so that it is free of dust and debris
- Apply a coat of primer to the door, and allow it to dry.
- Apply a coat of your chosen paint, following the painting guidance below.
- Give the paint an hour to dry, then apply a second coat.
- Give the second coat time to dry. Once it is completely dry you can turn it over and repeat the process on the other side.
- Finally, re-attach the hardware and re-hang the door.
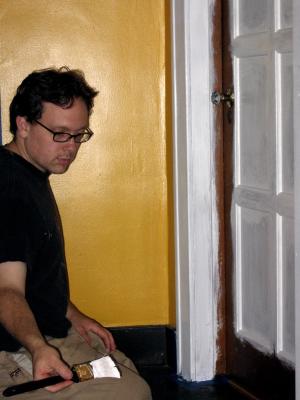
You should paint the door systematically, following the direction of the wood at all times so that the paint brings out the grain, creating a clean and professional look. Never paint across the grain, when the paint dries it will have an ugly and unprofessional finish. You can speed up the process by using a roller to paint the flat areas of the door, and using a brush to fill in any areas that the roller cannot reach. If you don’t have a roller you can achieve a good finish with a paint brush, but it may take a little longer.
Paint the door in this order:
- Start with the edges. If you are painting the door before hanging it, you should also paint the top and bottom at this point.
- Next, do the recesses and mouldings
- Work from top to bottom, painting the flat panels.
- Again, work from top to bottom, painting the cross strips and down strips
- Finally, paint the edge strips
Painting in a consistent and systematic order will ensure a smooth and even finish.
You may be able to skip the sanding and primer process if you are re-painting a door with a similar kind of paint – for example oil over oil, or latex over latex. You can test the paint on the door by rubbing a small spot with ammonia. If the paint peels it is latex based, if it does not it is oil based.
It is not a good idea to paint latex over oil, or vice-versa. Sand and re-prime the door instead for best results. After sanding your door it should be free of bumps and blemishes, but still have a surface that the paint or primer will be able to adhere to. Wipe the door thoroughly to remove dust and debris before painting.
Conclusion
Painting a door is quite a lengthy process, but it is not one that should be rushed. If you follow the process carefully you will end up with a door that has an attractive and professional looking finish.
Do not rush the painting process. In particular, make sure that the paint is completely dry before you re-attach the handles and hinges. If you attempt to hang the door while the paint is still tacky to the touch you may end up with unsightly and difficult to remove finger-prints on the paint, which will ruin the finish.