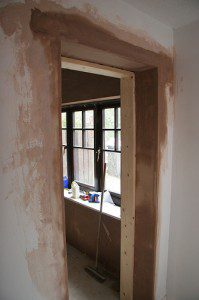
If you have just built a new wall and added a doorway, you will need to fit a door lining to create a perfectly aligned frame upon which you can hang your new door. If you are fitting a new door into an existing space, and the door lining is damaged, misaligned or rotten, then you may want to remove it and insert a new one.
Fitting a new door lining is a simple process, on paper, but it is one which should be done carefully. If the door lining does not fit perfectly then it will cause problems with the door itself. Doors which stick, jam or do not close correctly are not just unsightly and awkward to use, they are also more likely to get damaged and need replacing quickly.
Tools Needed
- Spirit level
- Screwdriver
- Tape measure
- A wooden mallet or a hammer
- Saw
- Wood glue
- Screws
- Set square

Time Required
Replacing door linings is an advanced job. Give yourself a full afternoon to work on the task. Do not rush the job.
Step by Step Instructions
1. If you are replacing an existing internal door lining, begin by removing the old lining to expose the wall or stud.
2. Door linings come in kits which contain three main pieces – the head, and two legs, or jambs. The head goes at the top of the door, and the legs run down the sides. Begin by holding the legs up to the studs on the wall, and marking the height of the door on the linings.
3. Measure the thickness of the head, and deduct that from the required length of the linings.
4. Hold the horizontal lining up to the top of the door, and mark the required length of that lining.
5. Confirm your measurements, and cut the linings to the correct size.
6. Now it is time to assemble and square the door lining:
- The head of the lining should have two notches, which accommodate the legs. Tap the legs into lace using a wooden mallet. The notches should be a snug fit for the legs.
- Screw the legs into place using some 80mm screws. Make sure that the screws go in perfectly straight, as the legs are quite thin, and it is easy to damage them. Make sure that the head and legs are completely flush.
- Brace the lining so that it is completely “square”. Place one brace diagonally across the top corner. The should form a right-angled triangle, with the head side of the triangle being 30cm in length, the leg side being 40cm in length, and the batten being 50cm long.
- Once the corner is braced, measure the width of the top (on the inside of the lining), and mark this length on a second batten. Place this batten at near the bottom of the door lining. Once the two battens are in place, you can be confident that the door lining is “square”.
- Temporarily secure the battens with screws.
- Trim the battens so that they are flush with the edges of the lining.
- The lining is now ready to insert into your door frame.
6. Insert the lining into the wall. It should be a snug fit.
7. If the lining does not align squarely with the wall, use small wooden spaces to fix any misalignment. It is especially important to ensure that the head is level and that the lining is exactly vertical.
8. Once the lining is in place, secure it with 100mm screw fixings. If you are fixing the lining into a wall with studs, then the screws by themselves will be able to hold the door in place well. If you are securing the lining directly into masonry, then you will need to use wall plugs to hold the lining in place.
9. When inserting the screws, make sure that the lining does not warp or get bent out of shape. If you encounter resistance, loosen that screw and re-adjust your lining.
10. Once the lining is in position, test it with a spirit level. Adjust it if necessary. In addition, sight the frame to make sure that it is completely in line with the door from front to back. If the door frame is mis-aligned, or “out of wind”, as it is called, then your door will not close properly.
11. When you are happy with the lining, you can move on to fitting the architrave, and the door. To save yourself some time, consider installing the strike plate before you start working on painting the frame and architrave.
Shop our extensive range of oak door frames, architraves and lining online now. Suitable for all door sizes up to 838mm. Great prices & 10 year guarantee!
Tips And Advice
Many door lining kits come with movable door stops. Pay attention to this if you want to change how the door opens and closes.
If you make a mistake, don’t panic! Simply un-screw the braces, re-do your measurements, and try again. You can fill in screw holes using putty and paint over the holes for a clean and attractive finish. The only mistake that is difficult to correct is if you cut too much from the door lining.
While you are working on the door lining, consider tackling any plastering work around the door. Next, install your architrave and skirting boards.
Conclusion
The above instructions apply to installing a frame for an interior door. The process is similar for an external door, however there are some additional security considerations.
Installing an interior door frame is an advanced DIY job, and one that you should only attempt if you are confident in your abilities, and have enough time to devote to the job. Do not attempt to install an exterior door frame unless you know how to ensure that the frame is strong and secure. An incorrectly fitted frame is a serious security risk, and could invalidate your insurance premiums. It is best to call in the experts for any external jobs.
If you’re fitting an external door, we have a handy guide you can read here.